Chapter 3
Installation Systems
Chapter 3: Installation Systems
INTRODUCTION
Laying hardwood floors can be quite complex, even if you are experienced, so be sure to review every step of your product’s instructions well in advance.
In chapter 3, let’s explore the different types of hardwood flooring installation and learn when they’re typically used. You’ll also learn about the importance of acclimating hardwood before you install it.
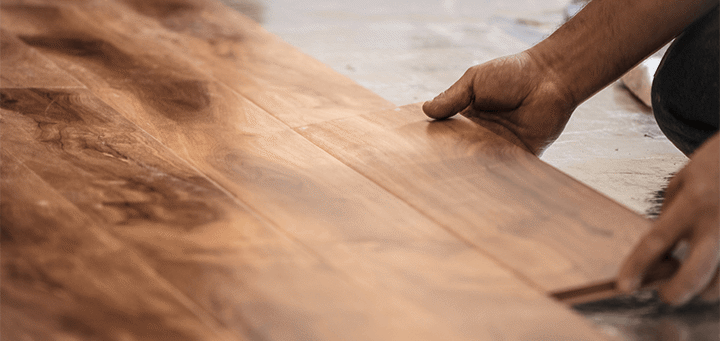
Types of Installation
BASIC DIFFERENCES
Nail or Staple Down
Hardwood flooring is secured to a wood or plywood subfloor using nails or staples.
Glue Down
Hardwood flooring is adhered to the subfloor using glue.
Floating Floor
Individual hardwood planks are adhered to each other with glue to create a floating floor that doesn’t have to be secured to the subfloor.
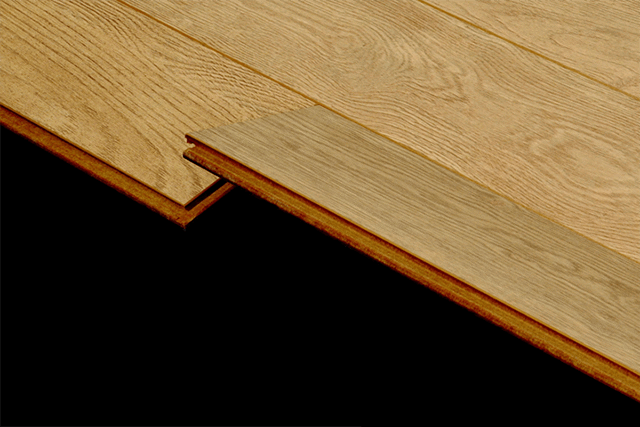
Locking
Individual planks lock into each other without the use of glue, to create a floating floor that doesn’t have to be secured to the subfloor.
Types of Installation
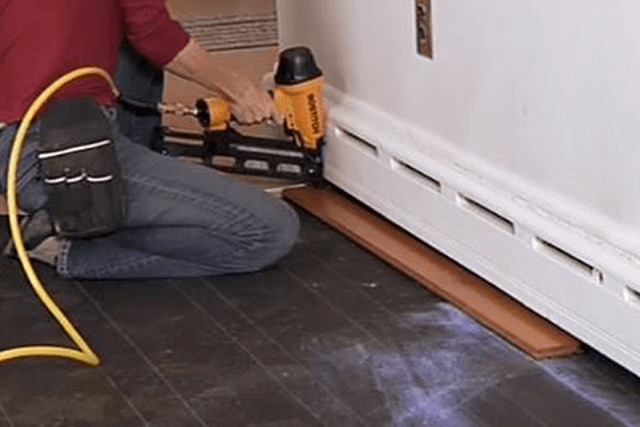
NAIL OR STAPLE DOWN (SOLID HARDWOOD FLOORING)
With this method, solid hardwood planks are attached to the subfloor with fasteners like nails, staples or cleats, which are not visible after installation.
This method is often used with plywood over concrete (or screed/sleepers on commercial jobs).
Types of Installation
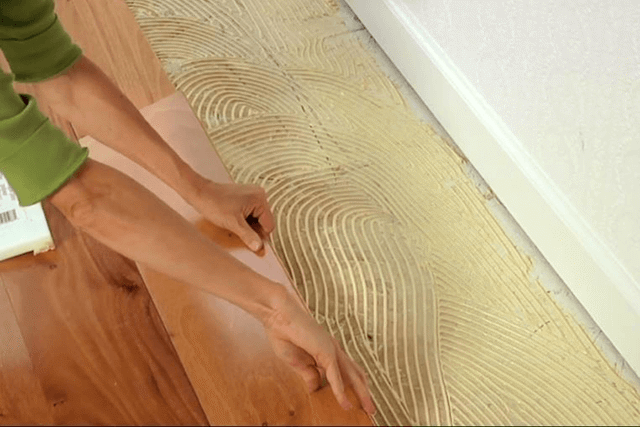
GLUE DOWN (ENGINEERED HARDWOOD)
Using a glue-down method, you can install engineered hardwood flooring directly over most subfloors, including concrete.
The specific product instructions will dictate what type of trowel and adhesive should be used. This may include polymeric resin, moisture cure urethane, water-based adhesive, acrylic or a hybrid product.
Types of Installation
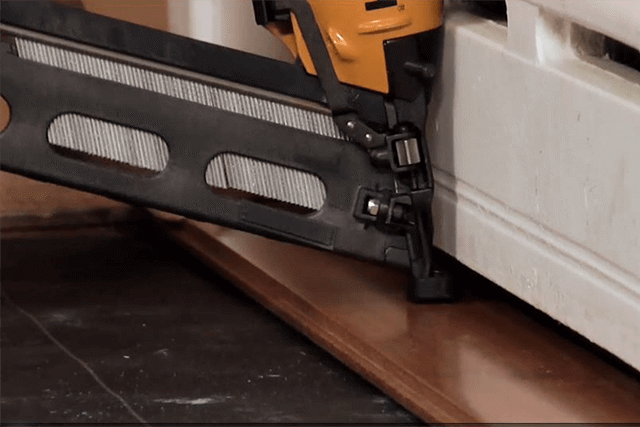
STAPLE DOWN (ENGINEERED HARDWOOD)
Engineered hardwood flooring is attached with staples to the subfloor, which can be plywood, oriented strand board (OSB), high-density particle board or even existing wood flooring.
A benefit to using staples over glue is that it can be walked on immediately. There may be some exceptions to engineered hardwood floors that can be stapled down – check product instructions.
Types of Installation
FLOATING FLOOR (ENGINEERED HARDWOOD)
With this type of installation, there’s no need to use staples, nails or glue to affix the hardwood floor to the subfloor. Instead, you adhere the boards to each other and the whole thing “floats” over a special foam underlayment.
Underlayment reduces moisture migration from the subfloor beneath, makes floors quieter underfoot, and smooths minor subfloor irregularities.
Types of Installation
LOCKING FLOOR (ENGINEERED HARDWOOD)
Like the floating floor, this method connects individual planks to each other so the engineered hardwood floor “floats” over the underlayment beneath.
The difference is, with locking floor installation you don’t use adhesives to keep the boards together. They are designed to snap together at the ends and edges. This makes for quicker installation, faster cleanup and easy board replacement.

Acclimating Hardwood
WHAT IS ACCLIMATION?
There’s a crucial step in the hardwood flooring installation process that is too-often overlooked: acclimation. This is the step where you place the hardwood in the environment where it is to be installed, so it “gets used to” the humidity and temperature it will be subject to going forward. Specific guidelines vary between products – always read installation instructions.
Acclimating Hardwood
WHY IS ACCLIMATION IMPORTANT?
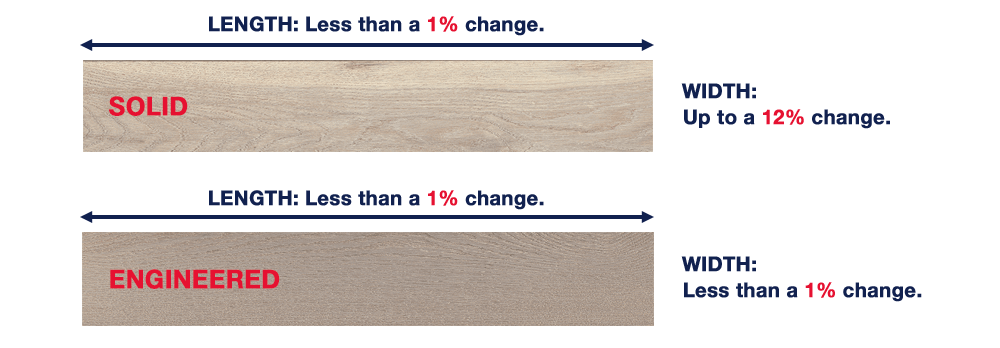
The #1 reason hardwood floor installation fails is a dimensional change in the flooring after installation.
Hardwood flooring, especially solid hardwood, expands and contracts when subject to environmental changes. You want this expansion/contraction to occur before the flooring is measured, nailed, stapled and glued to reduce the possibility of installation difficulties and cupping and cracking. And you want to accommodate future dimensional changes by leaving space for the hardwood to expand.
Acclimating Hardwood
ENVIRONMENTAL FACTORS
The #1 reason hardwood installation fails is a dimensional change in the flooring after installation.
Hardwood floors perform their best in the same comfort range that we typically enjoy ourselves: a relative humidity of 30–50%, and temperatures of 60–80 degrees. Under these conditions, the moisture content of wood stays in its ideal range of 6–9%.
When humidity and temperatures are too high or too low (like when hardwood is stored in a cold/dry or hot/humid space before installation) the moisture content of the wood changes too, causing shrinkage or expansion.
Acclimating Hardwood
ENVIRONMENTAL FACTORS
Where we live can affect the moisture content of wood subfloors. By ensuring your wood subfloor is acclimated, you’ll reduce the possibility that it will expand and contract and cause damage to your hardwood floors.

Acclimating Hardwood
EXAMPLE: SOLID HARDWOOD (WOOD SUBFLOOR)
Here is an example of the steps you can take to acclimate solid hardwood before installation when a wood subfloor is used — and how to accommodate future expansion and contraction.
Always refer to the specific product’s installation instructions.
-
Recommended moisture content for the solid hardwood flooring is 6 – 9%.
-
Maximum allowable moisture of the wood subfloor is 13%.
-
Acclimate the moisture content of the solid hardwood floor to +/- 4% of the wood subfloor moisture content.
-
Accommodate natural expansion and contraction with a minimum expansion space of 3/4” around all vertical obstructions.
Acclimating Hardwood
EXAMPLE: ENGINEERED HARDWOOD (WOOD SUBFLOOR)
Engineered hardwood is more dimensionally stable than solid, so it doesn’t usually need to be acclimated to the same extent as solid hardwood. However, when a wood subfloor is used you must account for possible expansion and contraction of the subfloor.
Always refer to the specific product’s installation instructions.
-
Recommended moisture content for the solid hardwood flooring is 6 – 9%.
-
Maximum allowable moisture of the wood subfloor is 13%.
-
Acclimate the moisture content of the solid hardwood floor to +/- 4% of the wood subfloor moisture content.
-
Accommodate natural expansion and contraction with a minimum expansion space of 1/4” around all vertical obstructions.
Acclimating Hardwood
EXAMPLE: ENGINEERED HARDWOOD (CONCRETE SUBFLOOR)
When using a concrete subfloor, engineered hardwood requires little to no acclimation and just minimal expansion space.
Always refer to the specific product’s installation instructions.
-
Recommended moisture content for the solid hardwood flooring is 6 – 9%.
-
Subfloor moisture test not to exceed 3 lbs/1000 vapor transmission per 24 hours on a Calcium Chloride test or 75% Rh.
-
Little to no acclimation is required.
-
Accommodate natural expansion and contraction with a minimum expansion space.